Our bassinet meets the requirements of DIN EN 1466:2023, a Europe-wide standard for portable lying units and carrycots for infants (e.g. carrycots or carrycots).
This standard sets strict safety standards to protect your baby in the best possible way – especially when used as a bassinet or in a Moses basket (e.g. on the way from the baby carriage to the house).
The most important points at a glance:
✅ Stability & safety: The cradle must be stable, must not tip over and must hold the baby securely – even if it moves.
✅ Ventilation & suffocation protection: Materials and construction must be such that your baby can breathe easily at all times.
✅ Instructions for use: The maximum load capacity (usually 9 kg) and correct use must be clearly marked.
Important: A bassinet in accordance with DIN EN 1466 is not intended for permanent sleep – it serves as a safe, transportable sleeping option for short periods of rest or when out and about.
Dimensions & materials
Dimensions of the frame
Lying height 770 mm
Width of the frame: 450 mm
Dimensions of the Moses basket
Length: 760 mm
Width: 390 mm
Height: 250 mm
Materials
The frame is made of poplar / birch and the Moses cob is made of cotton
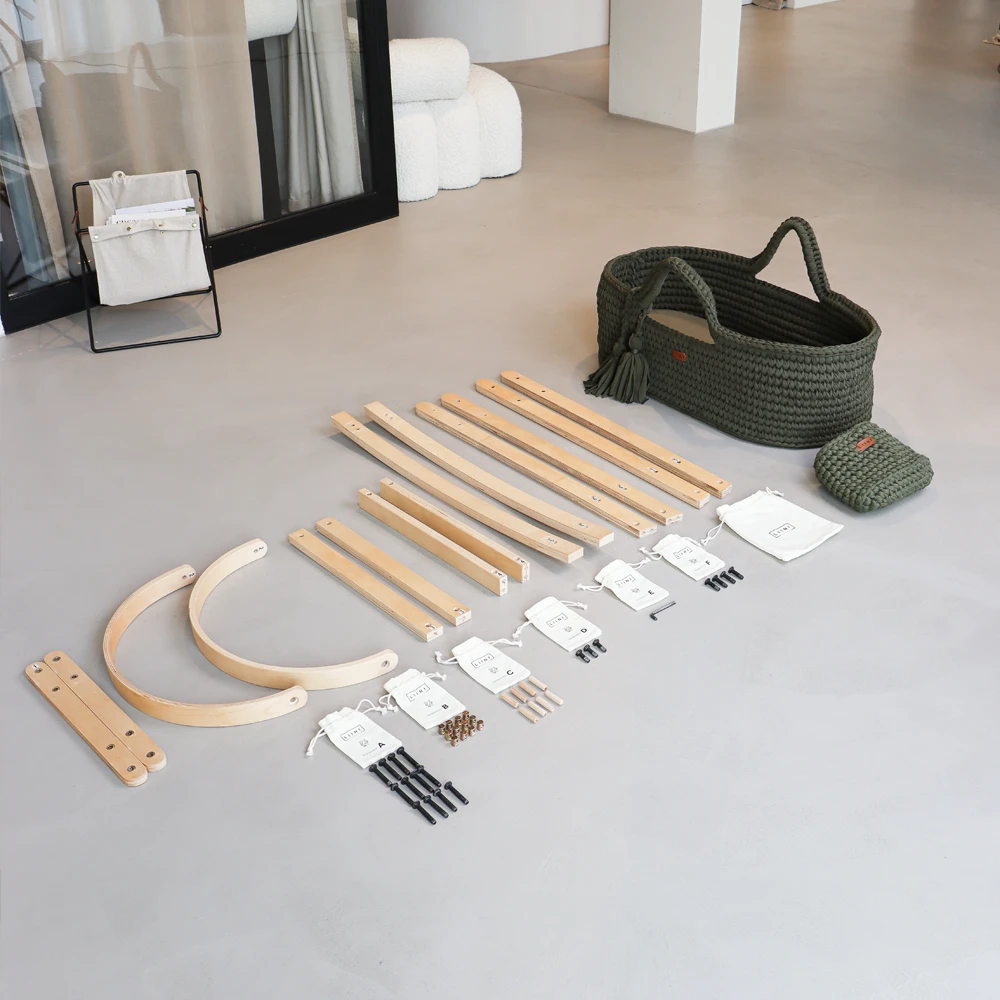
Check scope of delivery
Neatly packed and sorted is half assembled
Individual parts and screws
Congratulations on your purchase of the LIINI® cradle. Before you start assembling the cradle, we recommend that you check the entire scope of delivery.
The best way to do this is to lay all the screws and individual parts neatly on the floor.
The kit includes:
2x Item (1)
2x Item (2)
2x Item (3)
2x Item (4)
2x Item (5)
2x Item (6)
2x Item (7)
1x Moses basket
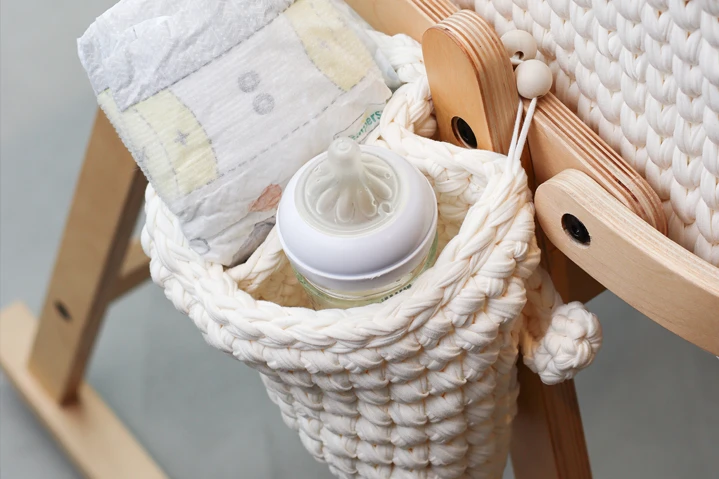
1x Side pocket for diapers or baby bottle
Cotton bag (A) with 12 screws (45 mm)
Cotton bag (B) with 12 round nuts
Cotton bag (C) with 8 wooden dowels
Cotton bag (D) with 4 screws (25 mm)
Cotton bag (E) with hexagonal wrench
Cotton bag (F) with 4 screws (20 mm)
Assembly instructions
For a smooth assembly
PDF assembly instructions
You need to allow approx. 20 to 30 minutes to set up the LIINI® cradle.
To protect the environment, we do not enclose paper assembly instructions.
You can download the assembly instructions in PDF format below and display them on your smartphone or tablet. You can of course also print them out if required.
With these instructions, you can easily assemble the LIINI bed frame step by step. Take around 20-30 minutes and it’s best to work in pairs – it’s more fun together! 😊 Before you start assembling, we recommend that you make a neat layout. Lay out the individual parts of the cradle on the floor. So you have everything to hand immediately.
2. Prepare side panels
Take the wooden parts with the numbers (4), (6) and (7) and insert the wooden dowels (C) from the small cotton bag into the matching pre-drilled holes. If necessary, you can use a rubber mallet to help you.
Make sure that the dowels are firmly in place – they will ensure a stable hold later on.
3. Insert round nuts
Before you connect the side parts to the wooden legs, insert the round nuts (B) from the cotton bag into the openings provided in parts (5), (6) and (7).
Pay attention to the correct installation direction (see picture) so that you can counter the round nuts later when tightening with the screwdriver.
4. Screw the legs to the side panels
Once you have inserted all the round nuts, you can screw the legs (5) to the prepared side parts (6) and (7). To do this, take the screws from the cotton bag (A) and use the Allen key from the bag (E).Do not use machines to tighten the screws, as too much force can damage the bassinet.
5. Relaxation exercises
Admittedly: With older siblings, the assembly can take a little longer than 20-30 minutes. However, it doesn’t hurt to loosen up and do gymnastic exercises in between. 😜
6. Attach the upper cross struts
After the loosening exercises, you can now prepare the upper cross struts (3) for assembly. Again, insert the round nuts (B) into the holes provided. Once you have inserted these, you can screw the cross struts (3) to the finished side sections (step 4). Use the screws from the bag (A) for this.
7. Attach the lower cross struts
Once the upper cross struts (3) have been fitted, the lower cross struts (4) now follow. To do this, insert the round nuts (B) into the holes provided and screw both cross struts (4) to the side panel to which you have already attached the upper cross struts in step 6. Use the screws from the bag (A) for this.
8. Connect the side panels together
You’ve almost made it! 🥳
Now connect both side parts together and screw them together with the screws from the bag (A).
Align the upper crossbars (3) and the lower crossbars (4) slightly before tightening so that they run parallel to each other and fit into the overall appearance of the cradle.
9. Attach the side moses basket holders
Now attach the side moses basket brackets (6) to the cradle frame on both sides using the screws (D). Make sure that the threaded inserts point outwards (see picture).
10. Screw down the fall protection
Finally, screw the fall protection for the Moses basket (2) to the wooden frame. Use the screws (F).
The wood must be held lightly in position by hand so that you do not jam the screw and possibly damage the thread. It is best to carry out this step in pairs.
11. Insert the Moses basket
Congratulations, you’ve made it! 😎
Now place your Moses basket in the frame. Carry out a final visual inspection and tighten all screws to be on the safe side.
Cleaning the cradle correctly
For the longevity of your cradle
So that you can enjoy the cradle for a long time
The muslin mattress cover can be removed thanks to the zipper and easily washed in the colored laundry program of your washing machine.
The Moses basket is best cleaned with a damp cloth and water. Do not use aggressive cleaning agents as this can lead to discoloration.
Washing symbols according to GINETEX
Nobody understands – but they have to
Gentle washing at 30°C
Gentle drying at 60°C
Do not iron
Do not bleach
Guarantee
LIINI® stands for quality.
The products are guaranteed for a total of 24 months from receipt of the order. Wear parts are completely excluded from the warranty.
Wear and tear parts are
Battery (The battery of the device has a service life of approx. 500 full charging cycles. After this, the battery will still provide approx. 80 % of its original power).
Seals (adapter and bottle warmer)
The warranty is also excluded:
If the defect is due to improper handling or use of the product that does not correspond to normal use.
To ensure the longevity and safety of the bottle warmer, it is important that they are used in accordance with the manual and our manufacturer’s instructions. We would like to point out that permanently connecting the battery-powered device to a power source over a longer period of time, especially overnight, will lead to an impairment of the battery performance and service life as well as to greatly increased wear and tear. In such a case, all guarantee and warranty claims are excluded!
If the defect is due to a malfunction caused by incorrect operation and is not in accordance with the instructions in the relevant user manual described in the operating instructions.
If the defect is due to external intervention, in particular repairs and interventions by persons not authorized by LIINI GmbH have been authorized.
If the product has been damaged due towater contact / water damage.
Normal signs of wear and tear do not invalidate the warranty.
LIINI GmbH can provide the warranty either by partial (e.g. spare parts such as seals) or complete replacement with an equivalent product.
In order to check the warranty claim, the customer must open a ticket under the corresponding category “Problem with device / defect” in the ticket system at www.LIINI.ch/support and provide the following evidence:
Video showing the problem
Figure 1: Front of the device
Figure 2: Rear of the device
Figure 3: Underside of the device
Figure 4: Heating plate of the appliance
If LIINI GmbH discovers any damage to the appliance (e.g. misshapen heating plate, untypical scratches or dents, etc.), any warranty is excluded.
By submitting the ticket, the customer confirms that all details are true. LIINI GmbH reserves the right to take appropriate legal action should it become apparent during the processing of the warranty claim that there is evidence of warranty fraud.
Manufacturer identification & contact address
According to the Product Safety Act ProdSG
Responsible for the import and distribution of all products:
If you already have a good fitting ring, you can use that to determine the size.
Step 1: Prepare material
An existing ring that fits well
A ruler or tape measure
A pen and a sheet of paper
Step 2: Measure the existing ring
Lay the existing ring flat on a flat surface. Make sure that it does not deform or twist. Use the ruler or tape measure to measure the inside diameter of the ring. This is the distance from one inner edge to the opposite inner edge of the ring. Note the measurement in millimeters.
Step 3: Compare with our size chart
Now compare the measurement you noted with our size scale and choose the appropriate ring size.
If you don’t have a matching ring at home, you can easily determine your size with the following procedure.
Step 1: Prepare material
A thin strip of paper or a piece of string
A pen
One pair of scissors
A ruler or tape measure
Step 2: Measure the circumference of the finger
Wrap the thin strip of paper or string around the finger you want to wear the ring on. Make sure the strip fits snugly, but not too tight or too loose. Use a pencil to mark the place where the strip or string overlaps.
Step 3: Check the size
To make sure that the determined ring size is correct, you can wrap the thin paper strip or string around your finger again and place the ring on it. Check that it fits comfortably and is not too loose or too tight. Repeat this step if necessary to find the optimal size.
Tip: If you want more accurate measurements, you can repeat the process several times and take the average of the measurements.
Step 4: Compare with our size chart
Now compare the measurement you noted with our size scale and choose the appropriate ring size.